A washing machine can occasionally experience drainage problems that prevent it from properly emptying water at the end of a cycle. Whether it’s due to a clogged hose, malfunctioning pump, or a more complex internal issue, learning how to drain a washing machine manually can save you time and frustration. This guide will walk you through the process of draining your washing machine, offering detailed instructions and tips for resolving common drainage problems. Let’s go over how to drain a washing machine.
Why Do Washing Machines Need Draining?
A washing machine’s drainage system plays an essential role in its operation. After a wash cycle, the water needs to be emptied from the drum before the spin cycle can commence. If this water is not drained properly, it can cause several problems, including the inability to spin, lingering detergent residues, or even water damage to the appliance and surrounding areas. There are several reasons why a washing machine might fail to drain, including a clogged drain hose, faulty pump, or even a power failure. Draining the machine manually can often provide a temporary solution and help you identify where the problem lies.
Step 1: Unplug the Washing Machine
Before attempting any work on your washing machine, safety should be your top priority. Always disconnect the power supply before starting any repairs or maintenance. This will help prevent accidental electrocution or damage to the appliance.
Unplugging the washing machine ensures that you will not encounter any issues with the power while troubleshooting. After disconnecting the power, you will be free to inspect and address the drainage issue without any electrical risks.
Step 2: Turn Off the Water Supply
After ensuring that your washing machine is unplugged, it’s important to turn off the water supply to the appliance. Most washing machines have valves located near the machine’s water connection, typically behind or underneath the unit. Turn both the hot and cold water valves to the “off” position to stop the flow of water into the machine.
Turning off the water supply is a critical step because it prevents any water from flowing back into the machine when you are working on it. This ensures that you do not inadvertently create a mess while draining or fixing the washing machine.
Step 3: Locate the Drain Hose and Prepare for Drainage
The next step is to locate the washing machine’s drain hose. The drain hose is the tube that carries the water out of the washing machine and into your home’s plumbing system. You’ll typically find it connected to the back of the machine, near the bottom, or inside a drainage pump.
Once you have located the drain hose, check for any visible obstructions or kinks. Kinks in the hose can obstruct the flow of water and prevent drainage. If the hose appears kinked or twisted, gently straighten it to allow for smooth water flow.
In some models, the drain hose is designed to be placed in a raised position to ensure that water flows freely from the machine. If the hose is incorrectly positioned, it could prevent the machine from draining properly. Make sure the hose is properly aligned before moving forward.
Step 4: Prepare for Water Removal
Now that you’ve located the drain hose, it’s time to prepare for the removal of water. You’ll want to have a bucket or a shallow container ready to collect any excess water that may flow out of the hose. Keep towels nearby to absorb any spillage.
Place the bucket or container near the hose’s end, making sure it’s positioned well to catch any water that will flow out. If your washing machine is not near a drain, you can also use a shop vac or a wet/dry vacuum to suck up the water. Be careful while handling the hose and water to avoid any mess.
Step 5: Detach the Drain Hose
Now, it’s time to detach the drain hose from the machine. You can do this by simply loosening the clamp that holds the hose in place or by unscrewing the hose from the machine. The clamp is usually secured with a small screw or clamp, so a screwdriver or pliers may be necessary to release it.
Once the clamp is loosened, gently pull the hose away from the machine. Allow any remaining water in the hose to drain into your container. Keep in mind that there may be some residual water trapped in the hose, so be sure to position your bucket or container underneath to catch the drips.
Step 6: Inspect the Drain Hose for Blockages
With the hose detached, it’s time to inspect it for any blockages or buildup that could be obstructing the flow of water. Use a flashlight to check the interior of the hose for debris, dirt, or detergent residue that could be clogging it.
If you find that the hose is blocked, you can use a long, flexible tool, such as a coat hanger, to dislodge the obstruction. Gently push the coat hanger through the hose to remove any blockages. You can also run water through the hose to help clear any remaining debris. Once the hose is clear, reattach it to the machine.
Step 7: Check the Pump Filter (If Applicable)
Many modern washing machines have a pump filter designed to catch small debris and prevent it from entering the drain system. If your machine has a pump filter, it’s a good idea to inspect and clean it during the draining process.
The pump filter is typically located at the bottom front of the washing machine, often behind a small access panel. To access the filter, you may need to unscrew the panel and remove it. Once the filter is exposed, carefully remove any debris or lint that has accumulated. Clean the filter with warm water and a cloth, and make sure it is securely placed back in its compartment.
Step 8: Inspect the Drain Pump (If Necessary)
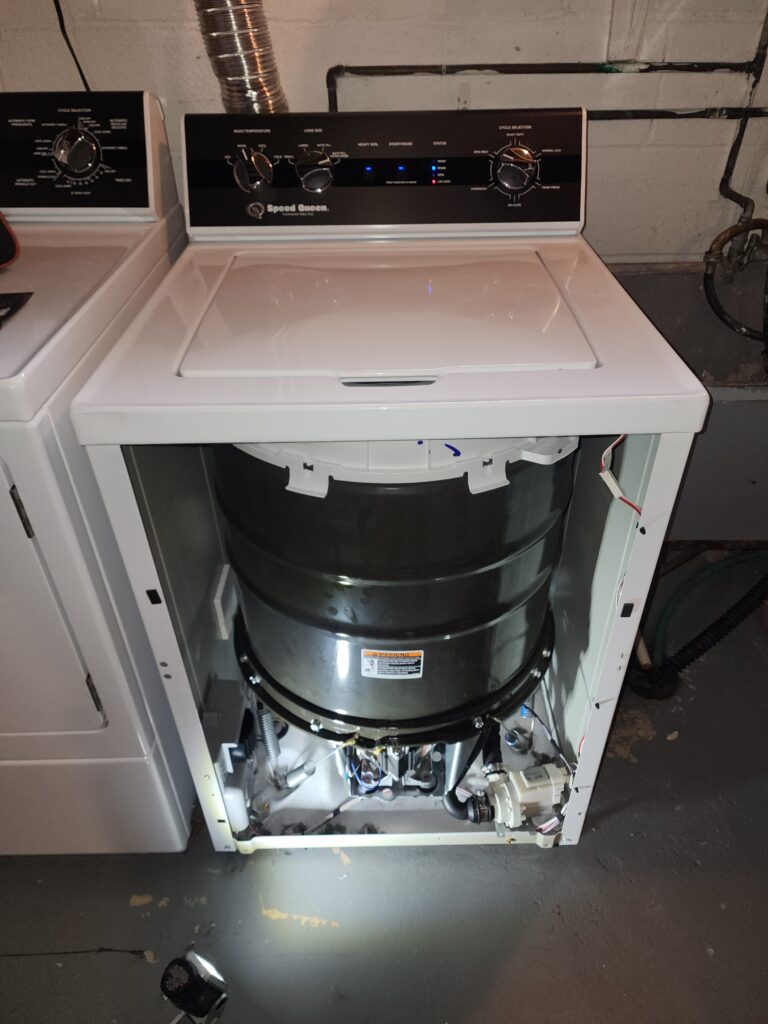
If your washing machine continues to have drainage issues despite clearing the drain hose and cleaning the filter, the problem may lie with the drain pump itself. The drain pump is responsible for pushing the water out of the machine, and if it becomes clogged or malfunctioning, it can prevent water from draining properly.
Inspect the drain pump for any signs of wear, damage, or blockages. If you suspect the pump is the issue, it’s best to call a professional repair technician to diagnose and replace the pump if necessary. Pump issues can be complicated to fix and may require specialized knowledge and tools.
Step 9: Reattach the Drain Hose
Once the drain hose is clear and the pump filter is clean, it’s time to reattach the drain hose. Slide the hose back into its proper position and secure it with the clamp or screws. Make sure the hose is tightly connected to prevent leaks when the machine is in use.
Ensure that the hose is not kinked, twisted, or obstructed. Double-check that it’s positioned properly and securely fastened before moving on.
Step 10: Test the Washing Machine
After you’ve completed the draining process, plug the washing machine back in and turn on the water supply. Run a short cycle to test whether the machine is draining properly. During the cycle, observe whether water is draining out of the hose and if the machine performs the spin cycle without issues.
If the machine drains properly and completes the cycle, the issue has been resolved. If it doesn’t drain properly, there may be a deeper mechanical problem that requires professional attention.
Conclusion
Learning how to drain your washing machine can be a valuable skill, particularly when dealing with drainage issues. By following the steps outlined in this guide, you can address many common drainage problems yourself, saving both time and money on professional repairs. However, if the issue persists or is caused by a malfunctioning pump or other internal components, it’s essential to seek professional help from an appliance repair technician. Regular maintenance, including clearing the drain hose and cleaning the pump filter, will help prevent drainage problems in the future and keep your washing machine operating efficiently.

