An oven range hood is an essential appliance in any kitchen. Knowing how to clean oven range hood comes with so many benefits. Why? Because it helps remove smoke, odors, grease, and airborne contaminants, keeping your kitchen air clean and your cooking area pleasant. However, over time, the range hood can accumulate a significant amount of grease and grime, reducing its efficiency and posing a potential fire hazard. Regular cleaning is crucial to maintain its performance and longevity. In this comprehensive guide, we’ll walk you through the steps to effectively clean your oven range hood.
Why Cleaning Your Range Hood Is Important
Before diving into the cleaning process, it’s important to understand why regular maintenance of your range hood is necessary:
- Improved Air Quality: A clean range hood efficiently removes smoke, steam, and cooking odors, keeping your kitchen air fresh.
- Fire Safety: Grease buildup in the range hood and filters can become a fire hazard. Regular cleaning reduces this risk.
- Optimal Performance: A clean range hood operates more effectively, ensuring better ventilation and reduced noise.
- Longevity: Regular maintenance extends the lifespan of your range hood, saving you from costly repairs or replacements.
Materials Needed
To clean your oven range hood, gather the following materials:
- Warm water
- Dish soap
- Baking soda
- White vinegar
- A non-abrasive sponge or cloth
- A soft-bristle brush
- Paper towels or microfiber cloths
- A degreaser (optional, for tough grease)
- A vacuum cleaner with a brush attachment (optional, for dust)
Step-by-Step Cleaning Process
- Preparation
- Turn Off the Power: Before you start cleaning, ensure the range hood is turned off. If possible, unplug it to prevent any electrical accidents.
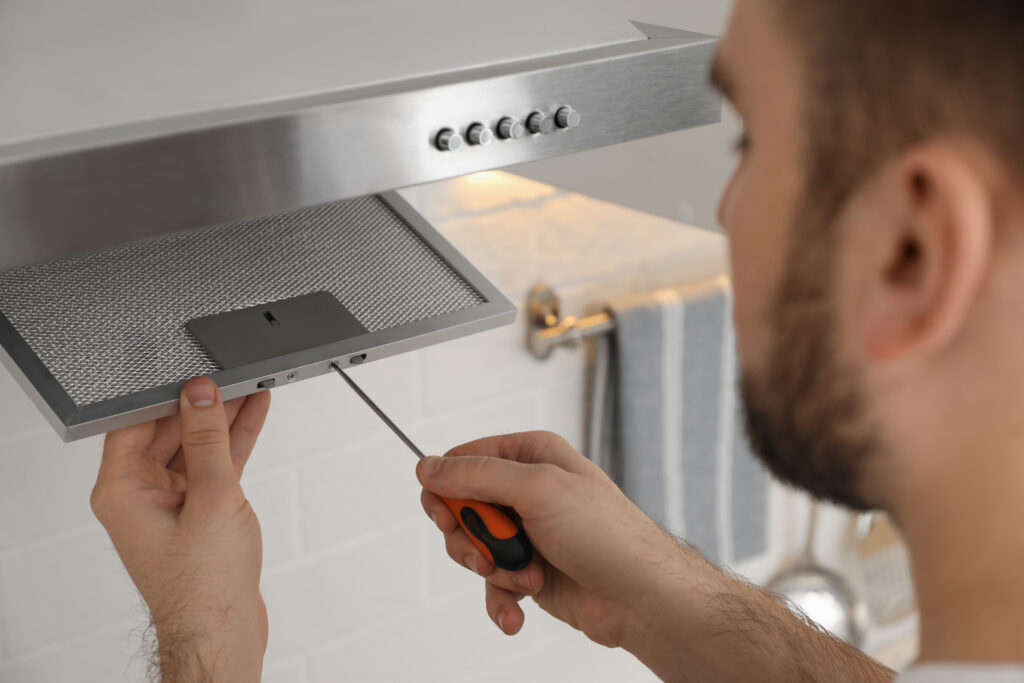
- Remove the Filters: Most range hoods have removable filters. Check your user manual for instructions on how to remove them. Typically, they slide or pop out easily.
2. Cleaning the Filters
- Soak the Filters: Fill a sink or large basin with hot water and add a few drops of dish soap and a cup of baking soda. Submerge the filters and let them soak for about 15-20 minutes to loosen the grease.
- Scrub the Filters: After soaking, use a soft-bristle brush or non-abrasive sponge to scrub the filters gently. Be thorough but careful not to damage the filters.
- Rinse and Dry: Rinse the filters under warm running water until all the soap and grease are removed. Shake off excess water and let them air dry completely before reinstalling.
3. Cleaning the Hood Exterior
- Remove Surface Dust: Use a vacuum cleaner with a brush attachment to remove any loose dust and debris from the exterior of the range hood.
- Wipe Down with Soapy Water: Mix warm water with a few drops of dish soap. Dampen a non-abrasive sponge or cloth in the soapy water and wipe down the exterior surfaces of the hood, including the buttons and controls. Pay extra attention to greasy areas.
- Use a Degreaser (if needed): For stubborn grease stains, apply a commercial degreaser or a mixture of vinegar and water (equal parts) to the affected areas. Let it sit for a few minutes before wiping it off with a damp cloth.
- Rinse and Dry: Wipe down the exterior with a clean, damp cloth to remove any soap or degreaser residue. Dry thoroughly with a paper towel or microfiber cloth to prevent streaks.
4. Cleaning the Hood Interior
- Access the Interior: If your range hood has a removable cover, take it off to access the interior. Be sure to follow the manufacturer’s instructions for removal.
- Clean the Interior Surfaces: Use the same soapy water solution to clean the interior surfaces of the hood. Be cautious around electrical components and wiring. Avoid getting them wet.
- Scrub Stubborn Areas: For tough grease spots inside the hood, use a mixture of baking soda and water to form a paste. Apply the paste to the grease spots and let it sit for a few minutes before scrubbing with a soft-bristle brush.
- Rinse and Dry: Wipe the interior surfaces with a clean, damp cloth to remove soap residue. Dry thoroughly with a paper towel or microfiber cloth.
5. Cleaning the Fan Blades (if applicable)
- Access the Fan Blades: Some range hoods allow you to access the fan blades for cleaning. Refer to your user manual for instructions on how to do this safely.
- Wipe Down the Blades: Use a damp cloth or sponge with soapy water to wipe down the fan blades. Be gentle to avoid bending or damaging them.
- Rinse and Dry: Wipe off any soap residue with a clean, damp cloth and dry the blades thoroughly before reassembling.
6. Reassemble and Test
- Reinstall the Filters: Once the filters are completely dry, reinstall them into the range hood.
- Reconnect the Power: Plug the range hood back in and turn it on to ensure everything is working correctly. Check that the fan operates smoothly and there are no unusual noises.
Maintenance Tips for Your Range Hood
To keep your range hood in top condition, follow these maintenance tips:
- Clean Regularly: Aim to clean your range hood, including the filters, at least once a month to prevent grease buildup.
- Use the Hood Properly: Always turn on the range hood while cooking to reduce grease and odor accumulation.
- Replace Filters: If your range hood uses disposable filters, replace them as recommended by the manufacturer. Washable filters should be cleaned regularly.
- Inspect for Issues: Periodically check for signs of wear, such as loose screws, damaged components, or reduced airflow. Address any issues promptly.
Conclusion: Trust My Appliance Guy for Expert Maintenance
Regularly cleaning your oven range hood is essential for maintaining a clean and safe kitchen environment. By following these steps and incorporating routine maintenance into your schedule, you can ensure your range hood operates efficiently and lasts longer. However, if you encounter any issues or need professional assistance, My Appliance Guy of Cleveland, Ohio, is here to help. With years of experience and a commitment to customer satisfaction, our skilled technicians can handle all your range hood maintenance and repair needs. Contact us today to keep your kitchen appliances in top-notch condition.


